388 lines
18 KiB
Markdown
388 lines
18 KiB
Markdown
作为系列文章的第十八篇,本篇将通过 ScrollPhysics 和 Simulation ,带你深入走进 Flutter 的滑动新世界,为你打开 Flutter 滑动操作的另一扇窗。
|
||
|
||
## 文章汇总地址:
|
||
|
||
> [Flutter 完整实战实战系列文章专栏](https://juejin.im/collection/5db25bcff265da06a19a304e)
|
||
>
|
||
> [Flutter 番外的世界系列文章专栏](https://juejin.im/collection/5db25d706fb9a069f422c374)
|
||
|
||
## 一、前言
|
||
|
||
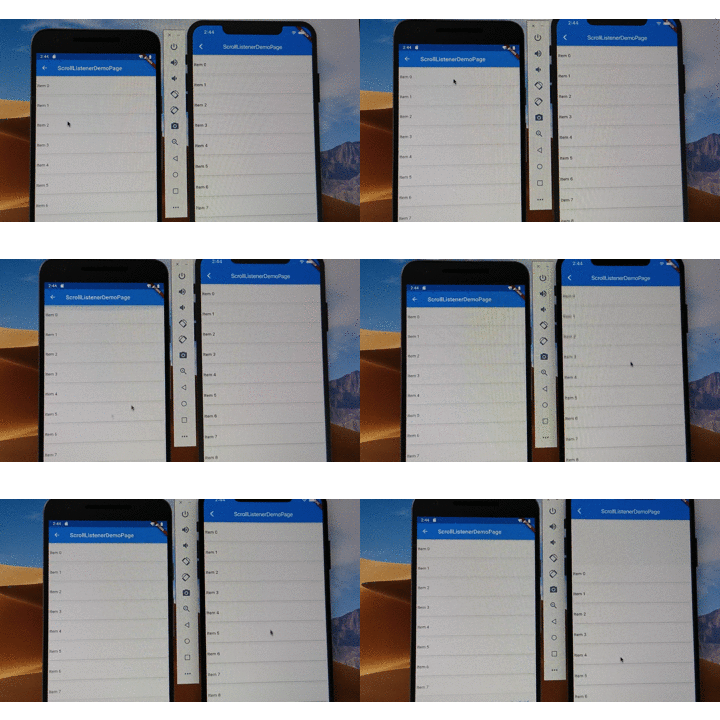
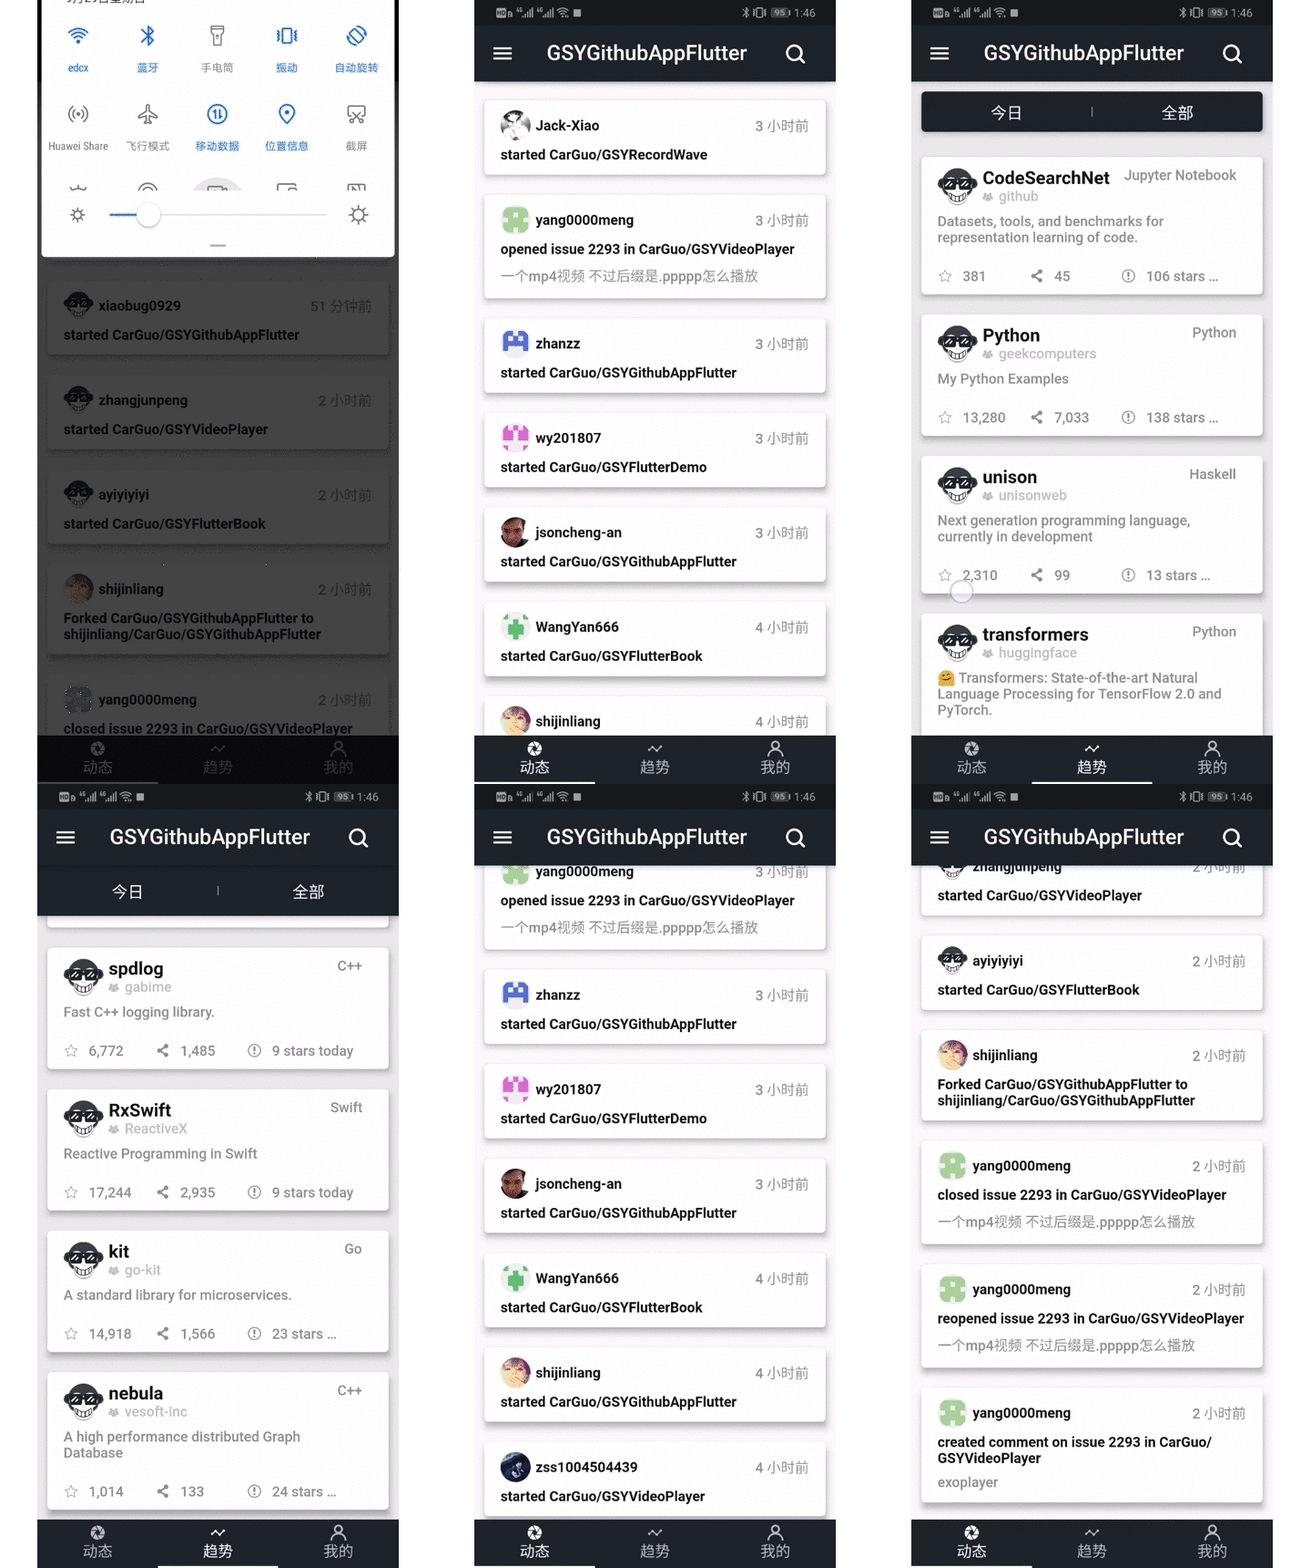
如下图所示是Flutter 默认的可滑动 `Widget` 效果,在 Android 和 iOS 上出现了不同的 **滑动速度与边缘拖拽效果** ,这是因为在不同平台上,默认使用了不同的 **`ScrollPhysics` 与 `Simulation`** ,后面我们将逐步介绍这两大主角的实现原理,**最终让你对 Flutter 世界的滑动拖拽进阶到 *“为所欲为”* 的境界。**
|
||
|
||
|
||
|
||
> 下方开始高能干货,请自带茶水食用。
|
||
|
||
## 二、 ScrollPhysics
|
||
|
||
首先介绍 `ScrollPhysics` ,在 Flutter 官方的介绍中,`ScrollPhysics` 的作用是 **确定可滚动控件的物理特性,** 常见的有以下四大金刚:
|
||
|
||
* **`BouncingScrollPhysics`** :允许滚动超出边界,但之后内容会**反弹**回来。
|
||
* **`ClampingScrollPhysics`** : 防止滚动超出边界,**夹住** 。
|
||
* **`AlwaysScrollableScrollPhysics`** :始终**响应**用户的滚动。
|
||
* **`NeverScrollableScrollPhysics`** :**不响应**用户的滚动。
|
||
|
||
在开发过程中,一般会通过如下代码进行设置:
|
||
|
||
```
|
||
CustomScrollView(physics: const BouncingScrollPhysics())
|
||
ListView.builder(physics: const AlwaysScrollableScrollPhysics())
|
||
GridView.count(physics: NeverScrollableScrollPhysics())
|
||
```
|
||
|
||
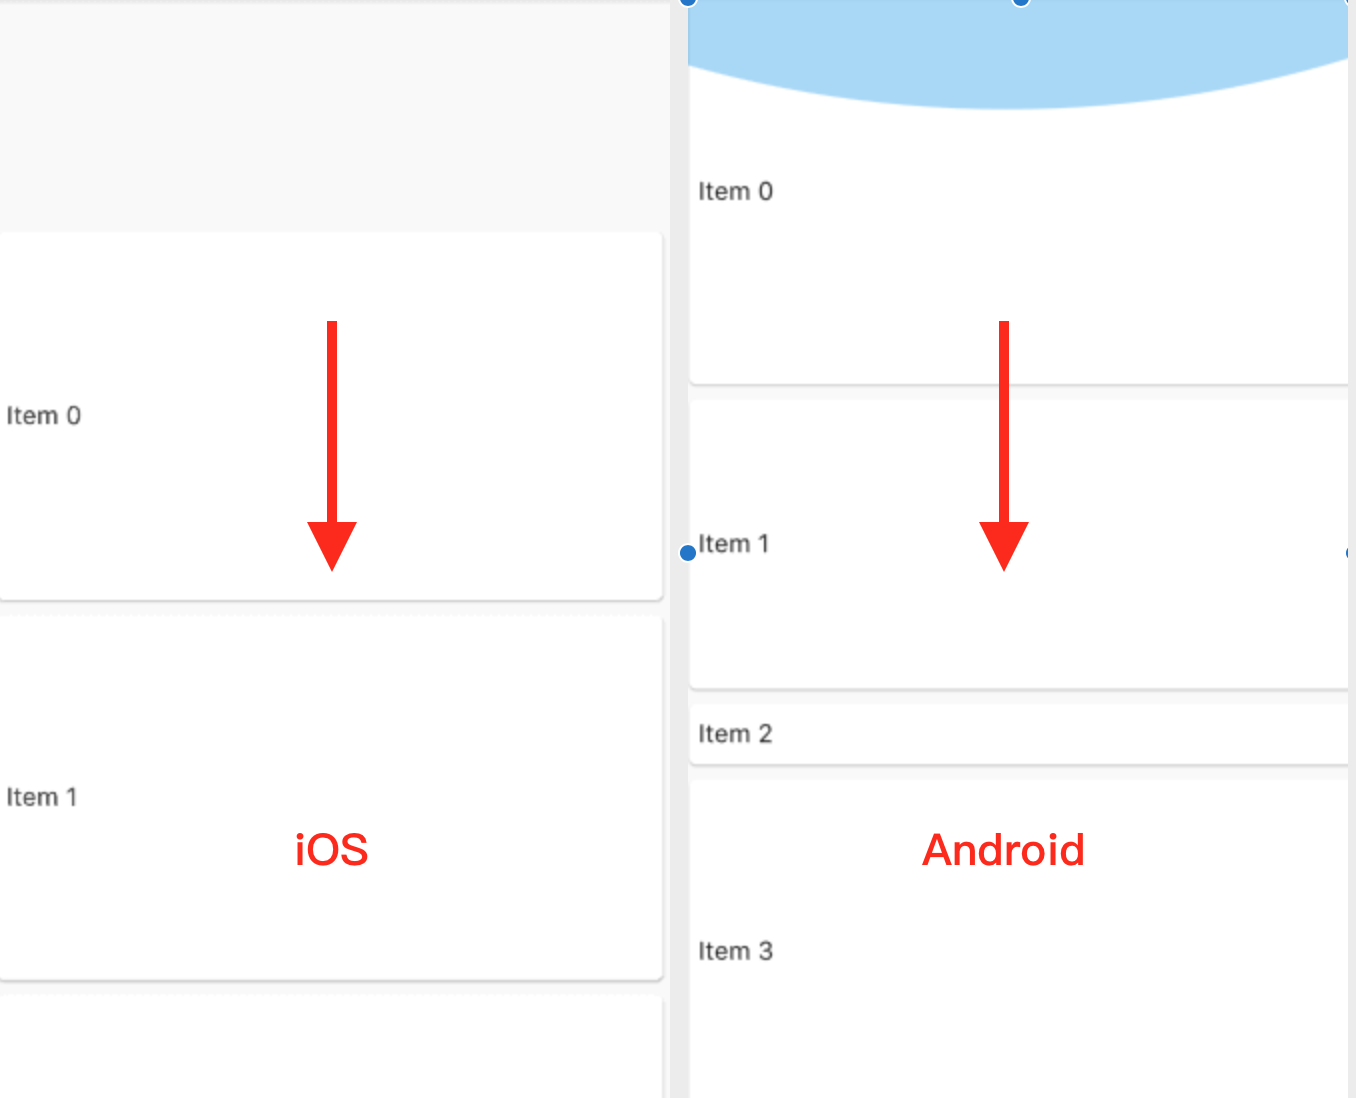
但在一般我们都不会主动去设置 **`physics` 属性,** 那么默认情况下,为什么在 Flutter 中的 `ListView` 、`CustomScrollView` 等 `Scrollable` 控件中,在 Android 和 iOS 平台的滚动和边界拖拽效果,会出现如下图所示的平台区别呢?
|
||
|
||
|
||
|
||
这里的关键就在于 **`ScrollConfiguration`** 和 **`ScrollBehavior`** 。
|
||
|
||
### 2.1、ScrollConfiguration 和 ScrollBehavior
|
||
|
||
我们知道所有的滑动控件都是通过 `Scrollable` 对触摸进行响应从而进行滑动的。
|
||
|
||
如下代码所示,在 `Scrollable` 的 **`_updatePosition`** 方法内,当 `widget.physics == null` 时,**`_physics` 默认是从 `ScrollConfiguration.of(context)` 的 `getScrollPhysics(context)` 方法获取** ,而 **`ScrollConfiguration.of(context)`** 返回的是一个 **`ScrollBehavior`** 对象。
|
||
|
||
```
|
||
// Only call this from places that will definitely trigger a rebuild.
|
||
void _updatePosition() {
|
||
_configuration = ScrollConfiguration.of(context);
|
||
_physics = _configuration.getScrollPhysics(context);
|
||
if (widget.physics != null)
|
||
_physics = widget.physics.applyTo(_physics);
|
||
final ScrollController controller = widget.controller;
|
||
final ScrollPosition oldPosition = position;
|
||
if (oldPosition != null) {
|
||
controller?.detach(oldPosition);
|
||
scheduleMicrotask(oldPosition.dispose);
|
||
}
|
||
_position = controller?.createScrollPosition(_physics, this, oldPosition)
|
||
?? ScrollPositionWithSingleContext(physics: _physics, context: this, oldPosition: oldPosition);
|
||
assert(position != null);
|
||
controller?.attach(position);
|
||
}
|
||
```
|
||
|
||
**所以默认情况下 ,`ScrollPhysics` 是和 `ScrollConfiguration` 和 `ScrollBehavior` 有关系。**
|
||
|
||
那么 **`ScrollBehavior`** 是这么工作的?
|
||
|
||
查看 **`ScrollBehavior`** 的源码可知,它的 `getScrollPhysics` 方法中,**默认实现了平台返回了不同的 `ScrollPhysics`** ,所以默认情况下,在不同平台上的滚动和边缘推拽,会出现不一样的效果:
|
||
|
||
```
|
||
ScrollPhysics getScrollPhysics(BuildContext context) {
|
||
switch (getPlatform(context)) {
|
||
case TargetPlatform.iOS:
|
||
return const BouncingScrollPhysics();
|
||
case TargetPlatform.android:
|
||
case TargetPlatform.fuchsia:
|
||
return const ClampingScrollPhysics();
|
||
}
|
||
return null;
|
||
}
|
||
```
|
||
|
||
前面说过, **`ScrollPhysics` 是确定可滚动控件的物理特性** ,那么如上图所示,**Android 平台上拖拽溢出的蓝色半圆的怎么来的?`ScrollConfiguration` 的 `ScrollBehavior` 是在什么时候被设置的?**
|
||
|
||
查看 `ScrollConfiguration` 的源码我们得知, **`ScrollConfiguration` 和 `Theme`、`Localizations` 等一样是 `InheritedWidget`,那么它应该是从上层往下共享的。**
|
||
|
||
所以查看 `MaterialApp` 的源码,得到如下代码,可以看到 **`ScrollConfiguration ` 是在 `MaterialApp` 内默认嵌套的,并且通过 `_MaterialScrollBehavior` 设置了 `ScrollBehavior`, 其 override 的`buildViewportChrome ` 方法,就是实现了Android 上溢出拖拽的半圆效果,** 其中 `GlowingOverscrollIndicator` 就是半圆效果的绘制控件。
|
||
|
||
```
|
||
@override
|
||
Widget build(BuildContext context) {
|
||
····
|
||
return ScrollConfiguration(
|
||
behavior: _MaterialScrollBehavior(),
|
||
child: result,
|
||
);
|
||
}
|
||
class _MaterialScrollBehavior extends ScrollBehavior {
|
||
@override
|
||
TargetPlatform getPlatform(BuildContext context) {
|
||
return Theme.of(context).platform;
|
||
}
|
||
@override
|
||
Widget buildViewportChrome(BuildContext context, Widget child, AxisDirection axisDirection) {
|
||
switch (getPlatform(context)) {
|
||
case TargetPlatform.iOS:
|
||
return child;
|
||
case TargetPlatform.android:
|
||
case TargetPlatform.fuchsia:
|
||
return GlowingOverscrollIndicator(
|
||
child: child,
|
||
axisDirection: axisDirection,
|
||
color: Theme.of(context).accentColor,
|
||
);
|
||
}
|
||
return null;
|
||
}
|
||
}
|
||
```
|
||
|
||
到这里我们就知道了,在默认情况下可滑动控件的 `ScrollPhysics` 是如何配置的:
|
||
|
||
- 1、**`ScrollConfiguration` 是一个 `InheritedWidget` 。**
|
||
- 2、**`MaterialApp` 内部利用 `ScrollConfiguration` 并共享了一个 `ScrollBehavior` 的子类 `_MaterialScrollBehavior`。**
|
||
- 3、**`ScrollBehavior` 默认根据平台返回了特定的 `BouncingScrollPhysics` 和 `ClampingScrollPhysics` 效果。**
|
||
- 4、**`_MaterialScrollBehavior` 中针对 Android 平台实现了 `buildViewportChrome` 的蓝色半球拖拽溢出效果。**
|
||
|
||
> ps :我们可以通过实现自己的 `ScrollBehavior` , 实现自定义的拖拽溢出效果。
|
||
|
||
## 三、ScrollPhysics 工作原理
|
||
|
||
**那么 `ScrollPhysics` 是怎么实现滚动和边缘拖拽的呢?** `ScrollPhysics` 默认是没有什么代码逻辑的,它的主要定义方法如下所示:
|
||
|
||
```
|
||
|
||
/// [position] 当前的位置, [offset] 用户拖拽距离
|
||
/// 将用户拖拽距离 offset 转为需要移动的 pixels
|
||
double applyPhysicsToUserOffset(ScrollMetrics position, double offset)
|
||
|
||
/// 返回 overscroll ,如果返回 0 ,overscroll 就一直是0
|
||
/// 返回边界条件
|
||
double applyBoundaryConditions(ScrollMetrics position, double value)
|
||
|
||
///创建一个滚动的模拟器
|
||
Simulation createBallisticSimulation(ScrollMetrics position, double velocity)
|
||
|
||
///最小滚动数据
|
||
double get minFlingVelocity
|
||
|
||
///传输动量,返回重复滚动时的速度
|
||
double carriedMomentum(double existingVelocity)
|
||
|
||
///最小的开始拖拽距离
|
||
double get dragStartDistanceMotionThreshold
|
||
|
||
///滚动模拟的公差
|
||
///指定距离、持续时间和速度差应视为平等的差异的结构。
|
||
Tolerance get tolerance
|
||
```
|
||
|
||
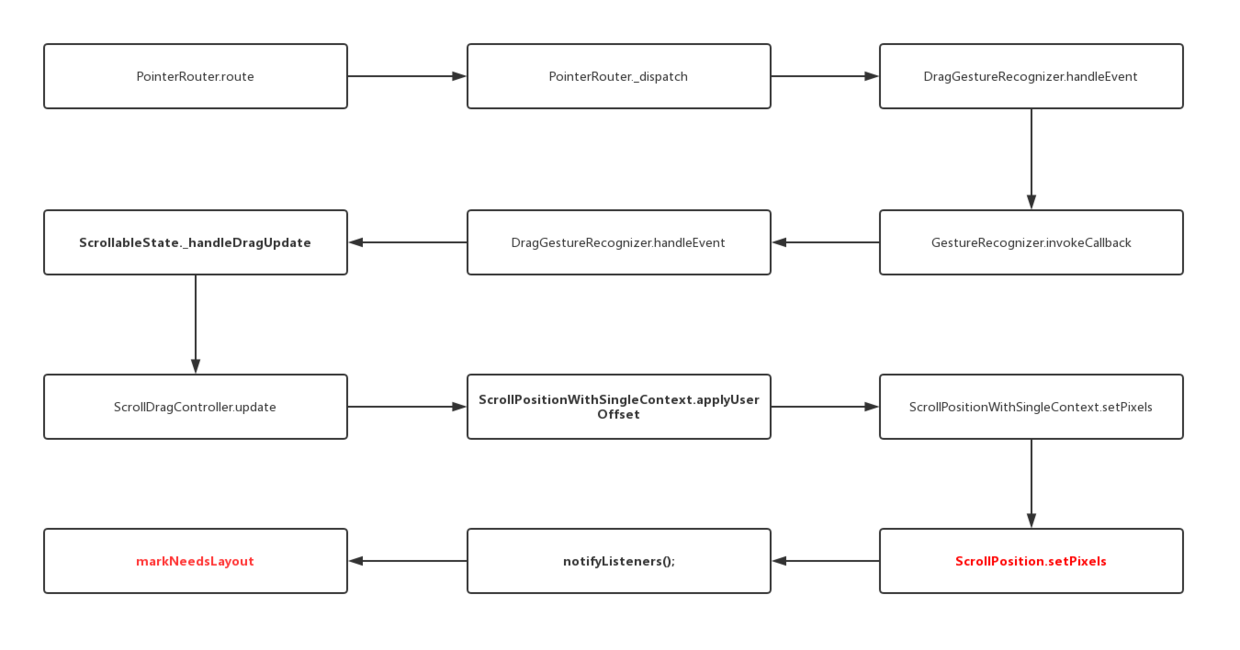
上方代码标注了 `ScrollPhysics` 各个方法的大致作用,而在前面 [《十三、全面深入触摸和滑动原理》](https://juejin.im/post/5cd54839f265da03b2044c32) 中,我们深入解析过触摸和滑动的原理,大致流程从触摸开始往下传递, 最终触发 `layout` 实现滑动的现象:
|
||
|
||
|
||
|
||
|
||
|
||
而 `ScrollPhysics` 的工作原理就穿插在其中,其流程如下图所示, 主要的逻辑在于红色标注的的三个方法:
|
||
|
||
- **`applyPhysicsToUserOffset`** :通过 physics 将用户拖拽距离 `offset` 转化为 `setPixels`(滚动) 的增量。
|
||
- **`applyBoundaryConditions`** :通过 physics 计算当前滚动的边界条件。
|
||
- **`createBallisticSimulation`** : 创建自动滑动的模拟器。
|
||
|
||

|
||
|
||
|
||
这三个方法的触发时机在于 `_handleDragUpdate` 、 `_handleDragCancel` 和 `_handleDragEnd` ,也就是拖动过程和拖动结束的时机:
|
||
|
||
- **`applyPhysicsToUserOffset` 和 `applyBoundaryConditions` 是在 `_handleDragUpdate` 时被触发的。**
|
||
- **`createBallisticSimulation` 是在 `_handleDragCancel` 和 `_handleDragEnd` 时被触发的。**
|
||
|
||
所以默认的 **`BouncingScrollPhysics`** 和 **`ClampingScrollPhysics`** 最大的差异也在这个三个方法。
|
||
|
||
### 3.1、applyPhysicsToUserOffset
|
||
|
||
`ClampingScrollPhysics` 默认是没有重载 `applyPhysicsToUserOffset` 方法的,**当 `parent == null` 时,用户的滑动 `offset` 是什么就返回什么:**
|
||
|
||
```
|
||
double applyPhysicsToUserOffset(ScrollMetrics position, double offset) {
|
||
if (parent == null)
|
||
return offset;
|
||
return parent.applyPhysicsToUserOffset(position, offset);
|
||
}
|
||
```
|
||
|
||
`BouncingScrollPhysics` 中对 `applyPhysicsToUserOffset` 方法进行了 `override` ,其中 **用户没有达到边界前,依旧返回默认的 `offset`,当用户到达边界时,通过算法来达到模拟溢出阻尼效果。**
|
||
|
||
|
||
```
|
||
|
||
///摩擦因子
|
||
double frictionFactor(double overscrollFraction) => 0.52 * math.pow(1 - overscrollFraction, 2);
|
||
|
||
@override
|
||
double applyPhysicsToUserOffset(ScrollMetrics position, double offset) {
|
||
assert(offset != 0.0);
|
||
assert(position.minScrollExtent <= position.maxScrollExtent);
|
||
|
||
if (!position.outOfRange)
|
||
return offset;
|
||
|
||
final double overscrollPastStart = math.max(position.minScrollExtent - position.pixels, 0.0);
|
||
final double overscrollPastEnd = math.max(position.pixels - position.maxScrollExtent, 0.0);
|
||
final double overscrollPast = math.max(overscrollPastStart, overscrollPastEnd);
|
||
final bool easing = (overscrollPastStart > 0.0 && offset < 0.0)
|
||
|| (overscrollPastEnd > 0.0 && offset > 0.0);
|
||
|
||
final double friction = easing
|
||
// Apply less resistance when easing the overscroll vs tensioning.
|
||
? frictionFactor((overscrollPast - offset.abs()) / position.viewportDimension)
|
||
: frictionFactor(overscrollPast / position.viewportDimension);
|
||
final double direction = offset.sign;
|
||
|
||
return direction * _applyFriction(overscrollPast, offset.abs(), friction);
|
||
}
|
||
```
|
||
|
||
### 3.2、applyBoundaryConditions
|
||
|
||
`ClampingScrollPhysics` 的 `applyBoundaryConditions` 方法中,在计算边界条件值的时候,**滑动值会和边界值相减得到相反的数据,使得滑动边界相对静止,从而达到“夹住”的作用** ,也就是**动态边界** ,所以默认请下 Android 上滚动到了边界就会停止响应。
|
||
|
||
```
|
||
@override
|
||
double applyBoundaryConditions(ScrollMetrics position, double value) {
|
||
if (value < position.pixels && position.pixels <= position.minScrollExtent) // underscroll
|
||
return value - position.pixels;
|
||
if (position.maxScrollExtent <= position.pixels && position.pixels < value) // overscroll
|
||
return value - position.pixels;
|
||
if (value < position.minScrollExtent && position.minScrollExtent < position.pixels) // hit top edge
|
||
return value - position.minScrollExtent;
|
||
if (position.pixels < position.maxScrollExtent && position.maxScrollExtent < value) // hit bottom edge
|
||
return value - position.maxScrollExtent;
|
||
return 0.0;
|
||
}
|
||
```
|
||
|
||
> ps: 前面说过蓝色的半圆是默认的 `ScrollBehavior` 内 `buildViewportChrome` 方法实现的。
|
||
|
||
`BouncingScrollPhysics` 中 `applyBoundaryConditions` 直接返回 0 ,**也就是达到 0 是就边界,过了 0 的就是边界外的拖拽效果了。**
|
||
|
||
```
|
||
@override
|
||
double applyBoundaryConditions(ScrollMetrics position, double value) => 0.0;
|
||
```
|
||
|
||
### 3.3、createBallisticSimulation
|
||
|
||
|
||
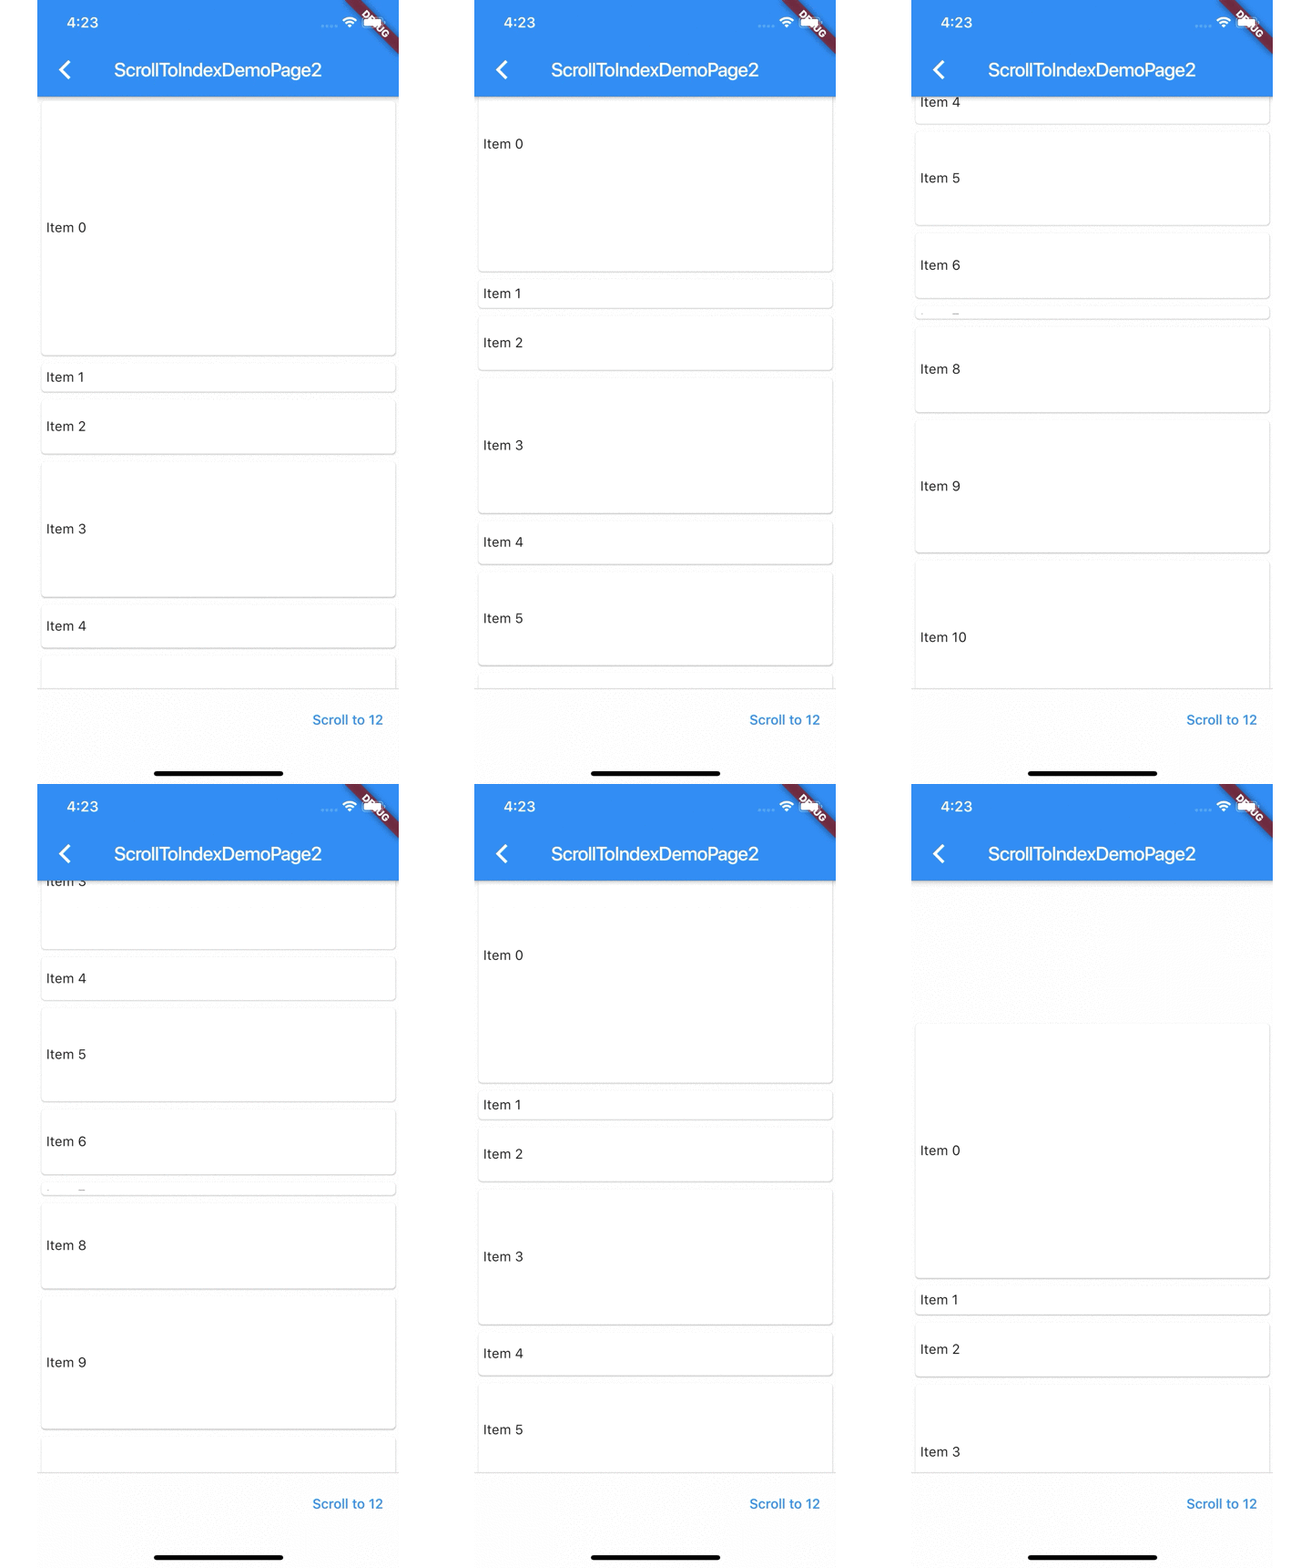
因为 `createBallisticSimulation` 是在 `_handleDragCancel` 和 `_handleDragEnd` 时触发的,其实就是停止触摸的时候,**当 `createBallisticSimulation` 返回 `null` 时,`Scrllable` 将进入 `IdleScrollActivity` ,也就是停止滚动的状态。**
|
||
|
||
如下图所示,完全没有 `Simulation` 的列表滚动,是不会连续滚动的。
|
||
|
||
|
||
|
||
|
||
`ClampingScrollPhysics` 的 `createBallisticSimulation` 方法中,**使用了 `ClampingScrollSimulation`(固定) 和 `ScrollSpringSimulation`(弹性) 两种 `Simulation`** ,如下代码所示,理论上只有 `position.outOfRange` 才会触发弹性的回弹效果,但 `ScrollPhysics` 采用了类似 **双亲代理模型** ,其 `parent` 可能会触发 `position.outOfRange` ,所以推测这里才会有 `ScrollSpringSimulation` 补充的判断。
|
||
|
||
如下代码可以看出,**只有在 `velocity` 速度大于默认加速度,并且是可滑动范围内,才返回 `ClampingScrollPhysics` 模拟滑动,否则返回 null 进入前面所说的 Idle 停止滑动,这也是为什么普通慢速拖动,不会触发自动滚动的原因。**
|
||
|
||
```
|
||
@override
|
||
Simulation createBallisticSimulation(
|
||
ScrollMetrics position, double velocity) {
|
||
final Tolerance tolerance = this.tolerance;
|
||
if (position.outOfRange) {
|
||
double end;
|
||
if (position.pixels > position.maxScrollExtent)
|
||
end = position.maxScrollExtent;
|
||
if (position.pixels < position.minScrollExtent)
|
||
end = position.minScrollExtent;
|
||
assert(end != null);
|
||
return ScrollSpringSimulation(
|
||
spring,
|
||
position.pixels,
|
||
end,
|
||
math.min(0.0, velocity),
|
||
tolerance: tolerance,
|
||
);
|
||
}
|
||
if (velocity.abs() < tolerance.velocity) return null;
|
||
if (velocity > 0.0 && position.pixels >= position.maxScrollExtent)
|
||
return null;
|
||
if (velocity < 0.0 && position.pixels <= position.minScrollExtent)
|
||
return null;
|
||
return ClampingScrollSimulation(
|
||
position: position.pixels,
|
||
velocity: velocity,
|
||
tolerance: tolerance,
|
||
);
|
||
}
|
||
```
|
||
|
||
`BouncingScrollPhysics` 的 `createBallisticSimulation` 则简单一些,**只有在结束触摸时,初始速度大于默认加速度或者超出区域,才会返回 `BouncingScrollSimulation` 进行模拟滑动计算,否则经进入前面所说的 Idle 停止滑动。**
|
||
|
||
```
|
||
@override
|
||
Simulation createBallisticSimulation(ScrollMetrics position, double velocity) {
|
||
final Tolerance tolerance = this.tolerance;
|
||
if (velocity.abs() >= tolerance.velocity || position.outOfRange) {
|
||
return BouncingScrollSimulation(
|
||
spring: spring,
|
||
position: position.pixels,
|
||
velocity: velocity * 0.91, // TODO(abarth): We should move this constant closer to the drag end.
|
||
leadingExtent: position.minScrollExtent,
|
||
trailingExtent: position.maxScrollExtent,
|
||
tolerance: tolerance,
|
||
);
|
||
}
|
||
return null;
|
||
}
|
||
```
|
||
|
||
|
||
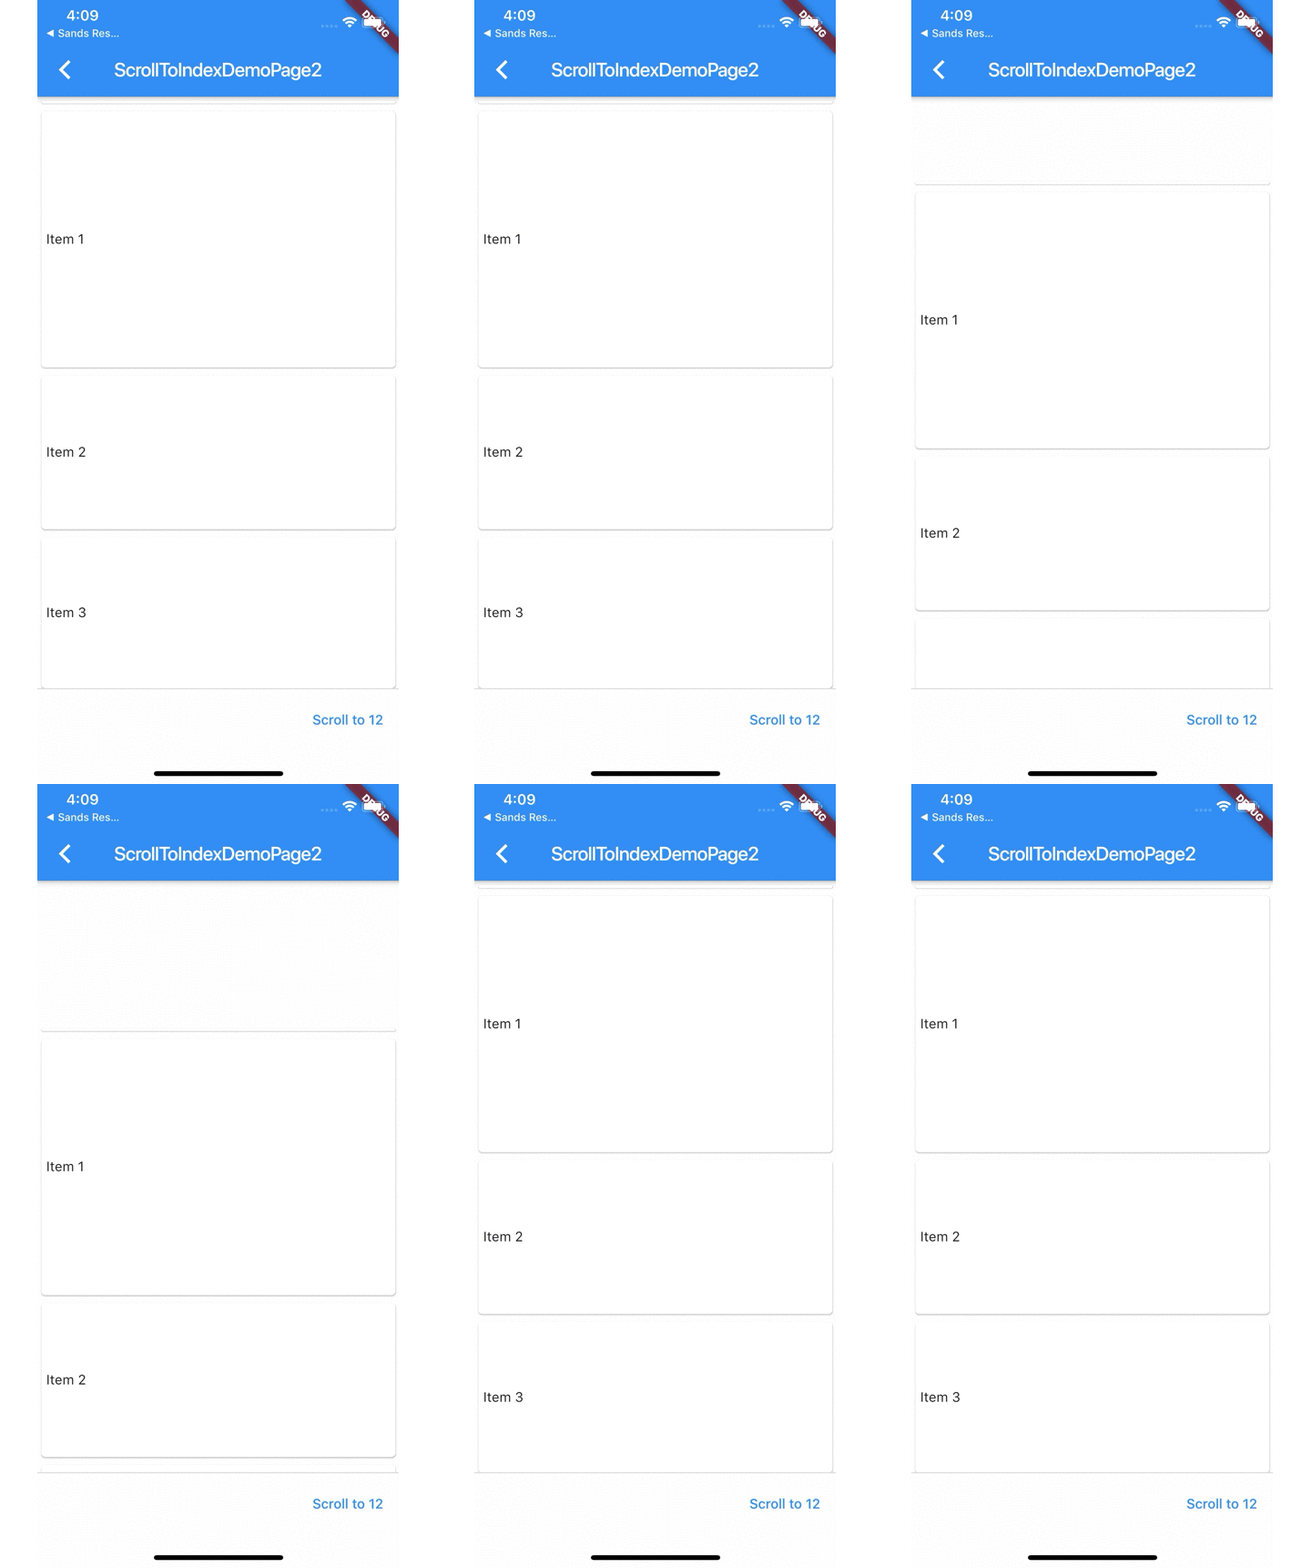
可以看出,在停止触摸时,**列表是否会继续模拟滑动是和 `velocity` 和 `tolerance.velocity` 有关,也就是速度大于指定的加速度时才会继续滑动** ,并且在可滑动区域内 `ClampingScrollSimulation` 和 `BouncingScrollSimulation` 呈现的效果也不一样。
|
||
|
||
如下图所示,**第一页面的 `ScrollSpringSimulation` 在停止滚动前是有一定的减速效果的;而第二个页面 `ClampingScrollSimulation` 是直接快速滑动到边界。**
|
||
|
||
|
||
|
||
|
||
> **事实上,通过选择或者调整 `Simulation` ,就可以对列表滑动的速度、阻尼、回弹效果等实现灵活的自定义。**
|
||
|
||
## 四、Simulation
|
||
|
||
前面最后说到了,利用 `Simulation` 实现对列表的滑动、阻尼、回弹效果的实现处理,那么 `Simulation` 是如何工作的呢?
|
||
|
||

|
||
|
||
如上图所示,**在 `Simulation` 的创建是在 `ScrollPositionWithSingleContext` 的 `goBallistic` 方法中被调用的** ,然后通过 `BallisticScrollActivity` 去触发执行。
|
||
|
||
```
|
||
@override
|
||
void goBallistic(double velocity) {
|
||
assert(pixels != null);
|
||
final Simulation simulation = physics.createBallisticSimulation(this, velocity);
|
||
if (simulation != null) {
|
||
beginActivity(BallisticScrollActivity(this, simulation, context.vsync));
|
||
} else {
|
||
goIdle();
|
||
}
|
||
}
|
||
```
|
||
|
||
在 `BallisticScrollActivity` 状态中,**`Simulation` 被用于驱动 `AnimationController` 的 `value` ,然后在动画的回调中获取 `Simulation` 计算后得到的 `value` 进行 `setPixels(value)` 实现滚动。**
|
||
|
||
|
||
> 这里又涉及到了动画的绘制机制,动画的机制等新篇再详细说明,简单来说就是 **当系统 `drawFrame` 的 `vsync` 信号到来时,会执行到 `AnimationController` 内部的 `_tick` 方法,从而触发 `_value = _simulation.x(elapsedInSeconds).clamp(lowerBound, upperBound);` 改变和 ` notifyListeners();` 通知更新。**
|
||
|
||
|
||
对于 `Simulation` 的内部计算逻辑这里就不展开了,大致上可知 **`ClampingScrollSimulation` 的摩擦因子是固定的,而 `BouncingScrollSimulation` 内部的摩擦因子和计算,是和传递的位置有关系。**
|
||
|
||
|
||
**这里需要着重提及的就是,为什么 `BouncingScrollPhysics` 会自动回弹呢?**
|
||
|
||
其实也是 `BouncingScrollSimulation` 的功劳,因为 `BouncingScrollSimulation` 构建时,会传递有 `leadingExtent:position.minScrollExtent` 和 ` trailingExtent: position.maxScrollExtent` 两个参数,**在 underscroll 和 overscroll 的情况下,会利用 `ScrollSpringSimulation` 实现弹性的回滚到 `leadingExtent` 和 `trailingExtent` 的动画,从而达到如下图的效果:**
|
||
|
||
|
||
|
||
## 最后
|
||
|
||
到这里 Flutter 的 `ScrollPhysics` 和 `Simulation` 就基本分析完了,严格意义上, `Simulation` 应该是属于动画的部分,但是这里因为`ScrollPhysics` 也放到了一起。
|
||
|
||
**总结起来就是 `ScrollPhysics` 中控制了用户触摸转化和边界条件,并且在用户停止触摸时,利用 `Simulation` 实现了自动滚动与溢出回弹的动画效果。**
|
||
|
||
|
||
> 自此,第十八篇终于结束了!(///▽///)
|
||
|
||
### 资源推荐
|
||
|
||
* Github : https://github.com/CarGuo
|
||
* **开源 Flutter 完整项目:https://github.com/CarGuo/GSYGithubAppFlutter**
|
||
* **开源 Flutter 多案例学习型项目: https://github.com/CarGuo/GSYFlutterDemo**
|
||
* **开源 Fluttre 实战电子书项目:https://github.com/CarGuo/GSYFlutterBook**
|
||
* 开源 React Native 项目:https://github.com/CarGuo/GSYGithubApp
|
||
|
||

|